

You can add the Attendance feature to a Blackboard module shell to track daily attendance, by recording individual students as present, late, absent or excused. The Attendance feature can then be used as an assessment criterion within the Grade Centre.
NOTE: This process is not a substitute for the use of MS Forms to monitor synchronous (i.e. live) online classes. Ensure you follow all the policies your faculties or directorates have in place for attendance monitoring.
In Blackboard you can manually record each student’s daily attendance with a percentage or grade that will then appear in the Grade Centre as a single column. This attendance column grade can then be included in grade calculations just like an assignment grade column. It is not possible to edit the meetings to relate them to a specific event. As you are not able to break days down into individual events, for example, if they attend a lecture and a workshop in a single day, you would need to combine them into a daily mark.
Enabling Attendance
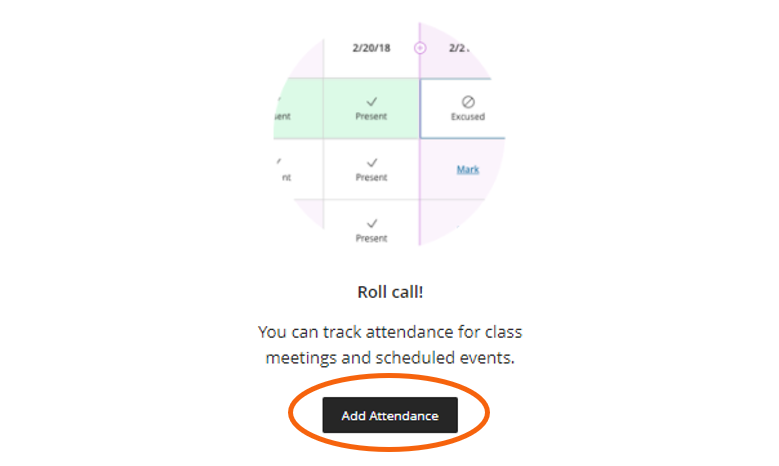
To use the attendance feature, open the Control Panel which is available under Course management, and open Course Tools. Select the Attendance option and when it opens for the first time select Add Attendance (figure 1).
Settings Panel
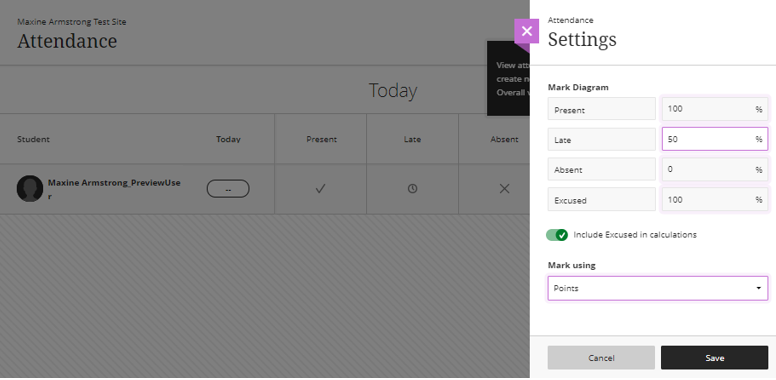
The settings panel will open the first time you open Attendance to let you change the marking schema and units. By using the Mark Diagram settings, you can change the percentage recorded for a late mark and how the overall grade will appear to students, either as a letter, points or a percentage. Click Save when you are ready to continue (figure 2).
If you decide to change these settings later on you can return to edit them by using the Settings (cog) icon on the attendance page (figure 3).

Marking attendance
Meeting view
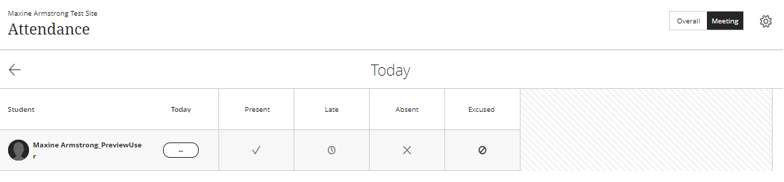
To mark attendance, open the Control Panel, then open Course Tools, and select Attendance. The attendance tool opens with the meeting view which will allow you to mark the attendance of all the students for that day (figure 4). You can assign a status to all the students by selecting that status’s header.
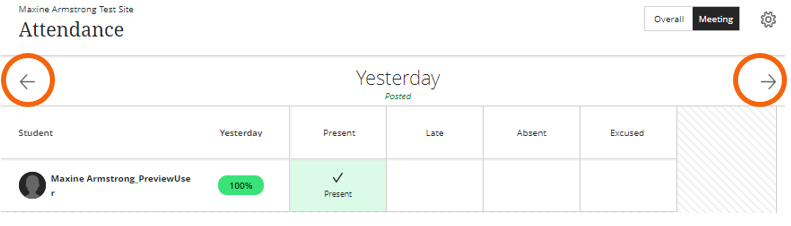
You can use Previous Meeting and Next Meeting to navigate between the meetings (figure 5).
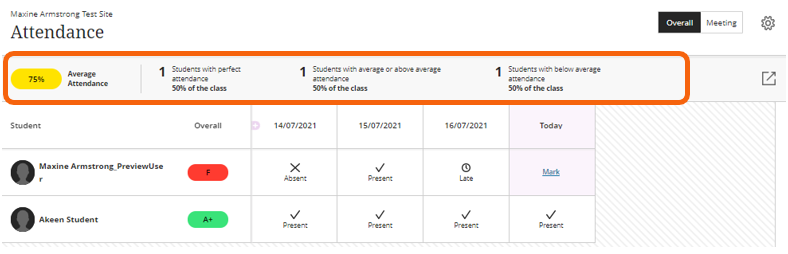
Overall view
You are also able to take an overall view of the attendance history and module statistics. Here you can edit each student’s individual attendance or select a header to edit the status for all students. The module statistics will show average attendance and a breakdown of how many students have perfect, average or below average attendance (figure 6).
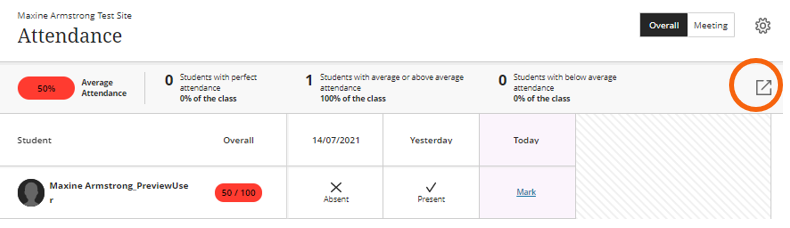
Use Export to download a CVS file with all the students’ attendance records (figure 7). Note that when you click Export it will download immediately without confirming.
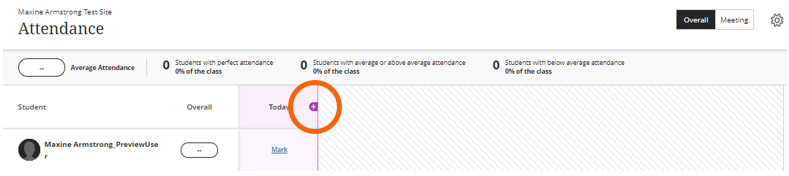
Adding a Meeting
You can add a new event in the Overall View by selecting the plus icon next to an existing column (figure 9):
Grade Centre view
Attendance is recorded in the Grade Centre as an overall mark in a single column (figure 9). Although you can edit this column as you can any other Grade Centre column, you should make changes to a student’s attendance through the Attendance feature to maintain consistency.

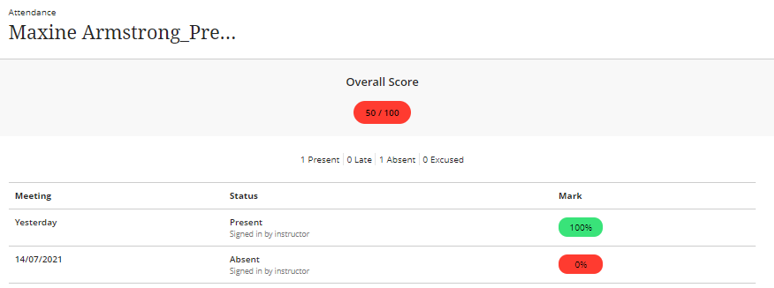
Student view
Students can view their attendance from the My Grades/My Marks page. They will be able to see their overall score and then a list of their attendance by day (figure 10).
Banner image of Edith Murphy House by REDPix, © De Montfort University, 2019.